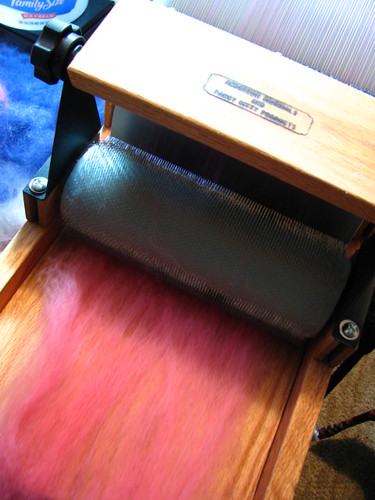
Today’s photo tutorial will focus on making a layered batt, which results in a multi-color roving when pulled….either straight from the swift of the drum carder, or made later by zig-zag tearing the batt. If you haven’t joined me for one of these before, the carder is a Big Tom from Ron Anderson at Fancy Kitty. This method will work on whatever carder you happen to have.
I started with three carded batts of wool I had hand dyed. Here I have magenta, navy blue, and white blended with some sparkly firestar. I ran both of these batts twice, so they are well carded and blended. Each batt is about 3 ounces.

Next, I pulled each batt into 3 parts, and weighed them out so that the finished batts would be as consistant as possible.

Now to the carder! I chose the fiber with the longest staple to put down first on the carder, to make it easier to get the batt or roving off the swift later. Here I am pulling a ‘leaf’ from my magenta batt. Just hold the end with both hands and gently scrunch and pull so the layers separate. (Making a heart frame for your carder is optional. LOL!)
Then if you continue to pull the layers apart, you get a nice thin and wide batt that will just flow onto the swift.
After I got all the layers of magenta on the carder, I did some burnishing. This is a dog slicker brush, it has nice flexible teeth that won’t damage the teeth on the carder. Then I continued in the same way, putting on the white with firestar, and the navy blue layers.


Now I have a nice full swift, and I’m ready to pull some roving. To start, lift up just a small portion of the batt.
Then thread the bit through something with a smallish hole to use as a diz. This is a button from my kids’ beading stuff. You can punch a hole (with a paper punch) in a plastic lid and that would do as well. Or you could get all fancy and purchase a real diz!
And then…..well….pull! Hold the diz close to the drum and guide it around in a spiral with one hand, and give the fiber a bit of a twist and pull with the other.
Here I am, with about half the roving pulled from the drum carder. And then, well….it happens to everyone……oops!

No biggie if you are pulling roving for yourself, just keep going and you’ll join it up again when spinning. Here’s my finished hand pulled roving.
Then I went back and layered the rest of the wool for two more batts. This time, I pulled them as batts. I wanted to try my hand at twisting them into buns….it was a bit challenging, since the batts on Tom are a yard long! I accordion folded the batts in thirds so that both sides would show, then twisted both ends, let it coil up, and tucked in the ends.


And last, but not least…..when I carded the original single color batts, I saved the stuff from the licker in, and carded it all together to make a nice art batt.


Thanks for joining me for yet another installment of fun with a drum carder!


How very cool! Thanks! 🙂
Thank you so much for taking the time to post this tutorial. I found it helpful and can’t wait to get the carder rolling.
Very nice tutorial… I hadn’t thought of pulling a roving off the drum carder like that before.